 "TysMagic" (twjeffery)
08/15/2019 at 08:30 • Filed to: miata, mx5, mx-5, mazda
 4
4
 18
18|
"TysMagic" (twjeffery)
08/15/2019 at 08:30 • Filed to: miata, mx5, mx-5, mazda | 4
| 18 |
It’s been a minute since I had a car with hood struts from the factory. I don’t do a ton of poking around under the hood so it’s not a make or break thing, but I had it on my want list to swap the hood prop out on the ND for struts.
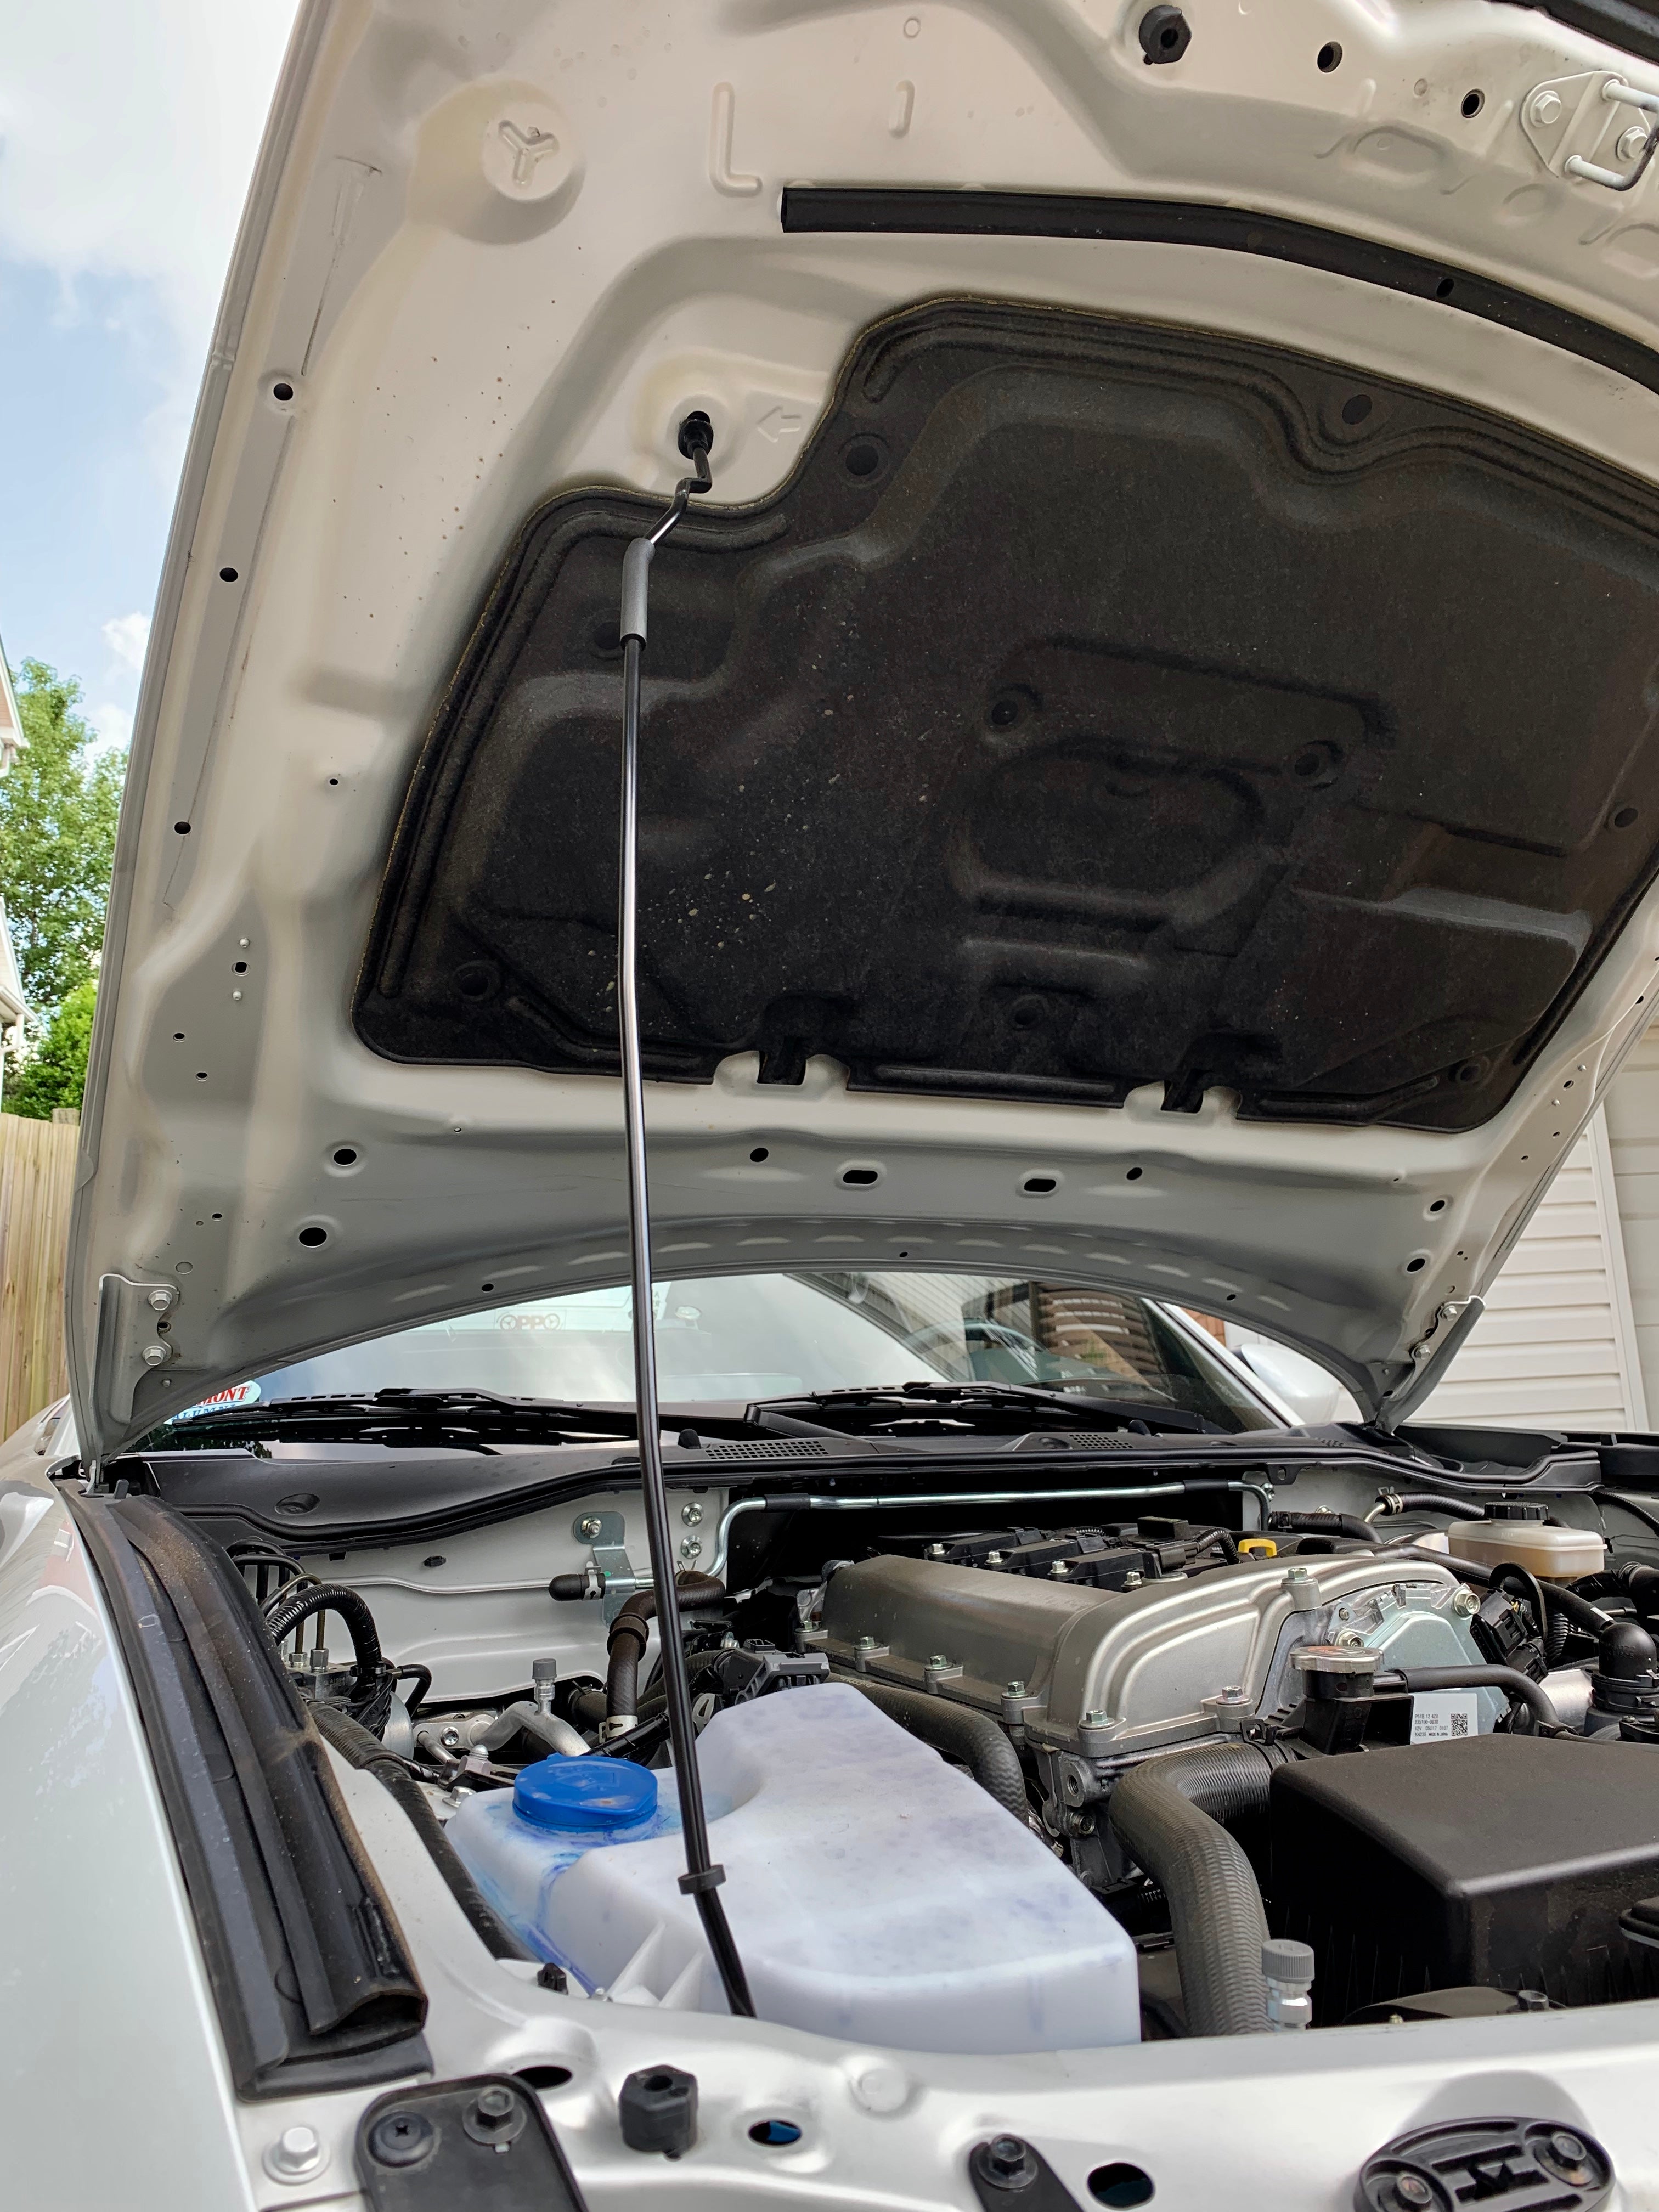
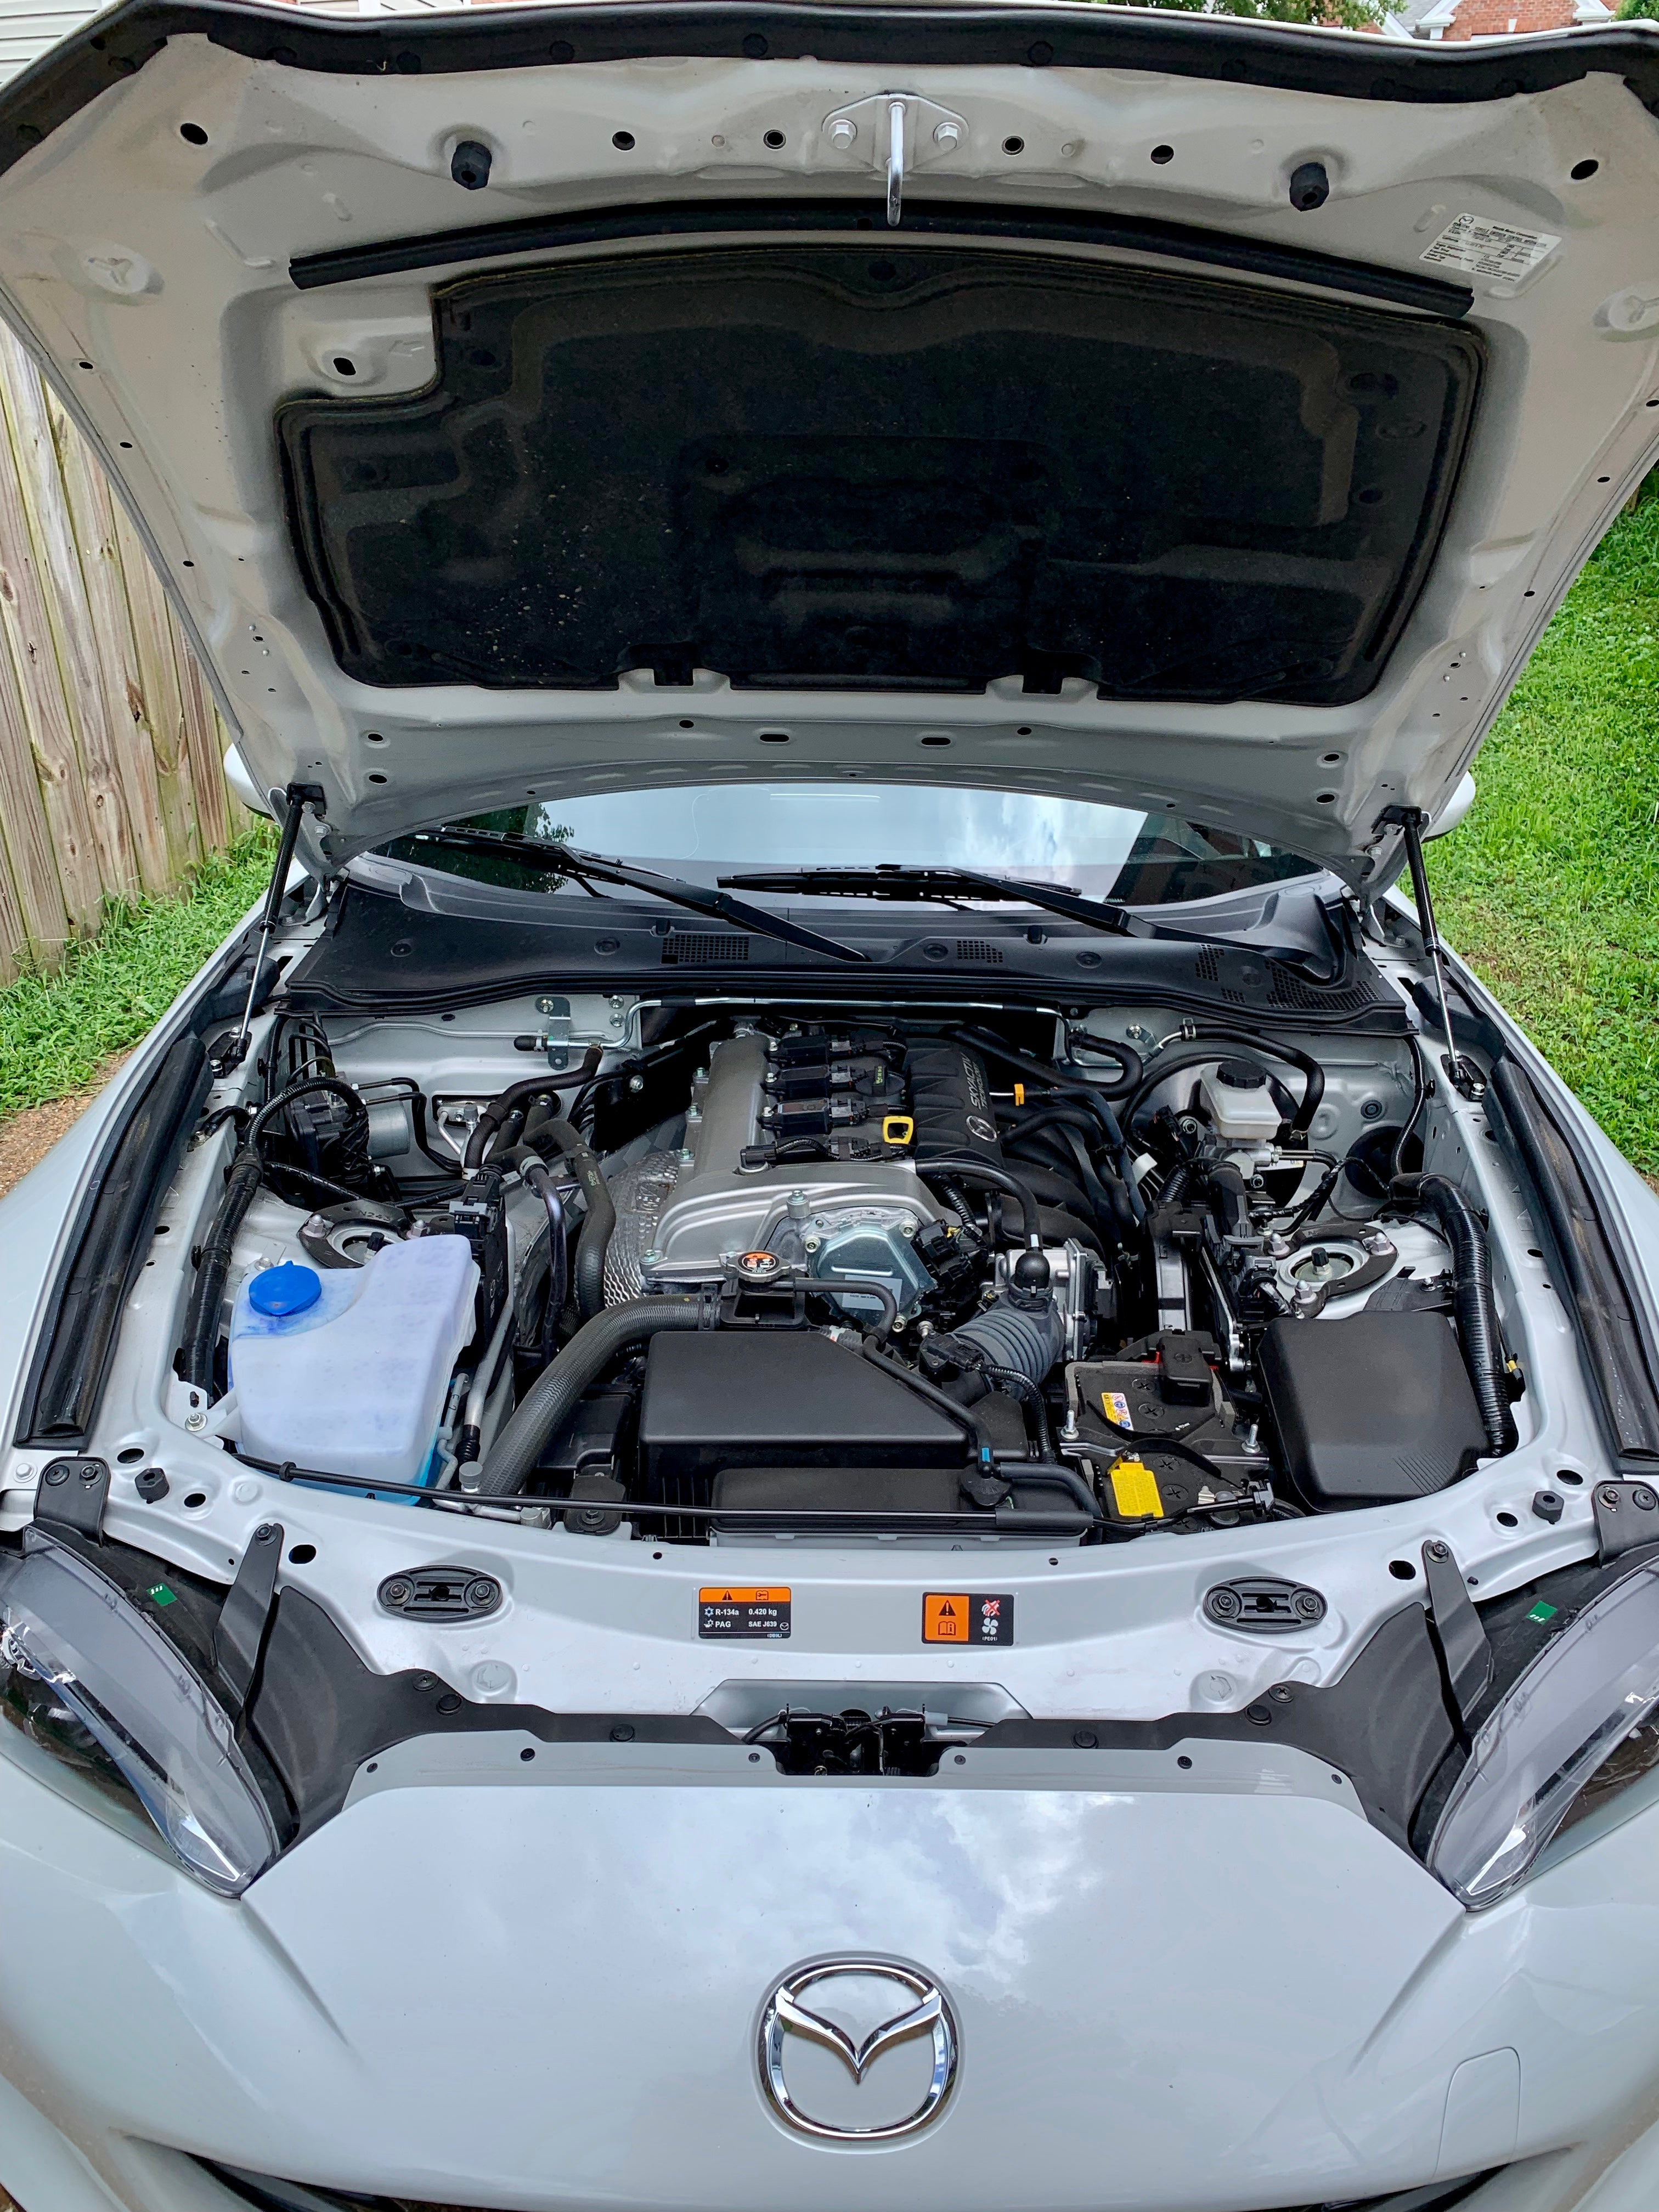
Note I do not clean up washer fluid reservoir and I have no excuse for that
So over the weekend that is what I did! S/O to my uncle for letting me use his driveway and storing my tools while we do that whole apartment life thing.
I did at least wash the car after this though
This is the second round of
!!!error: Indecipherable SUB-paragraph formatting!!!
work with
!!!error: Indecipherable SUB-paragraph formatting!!!
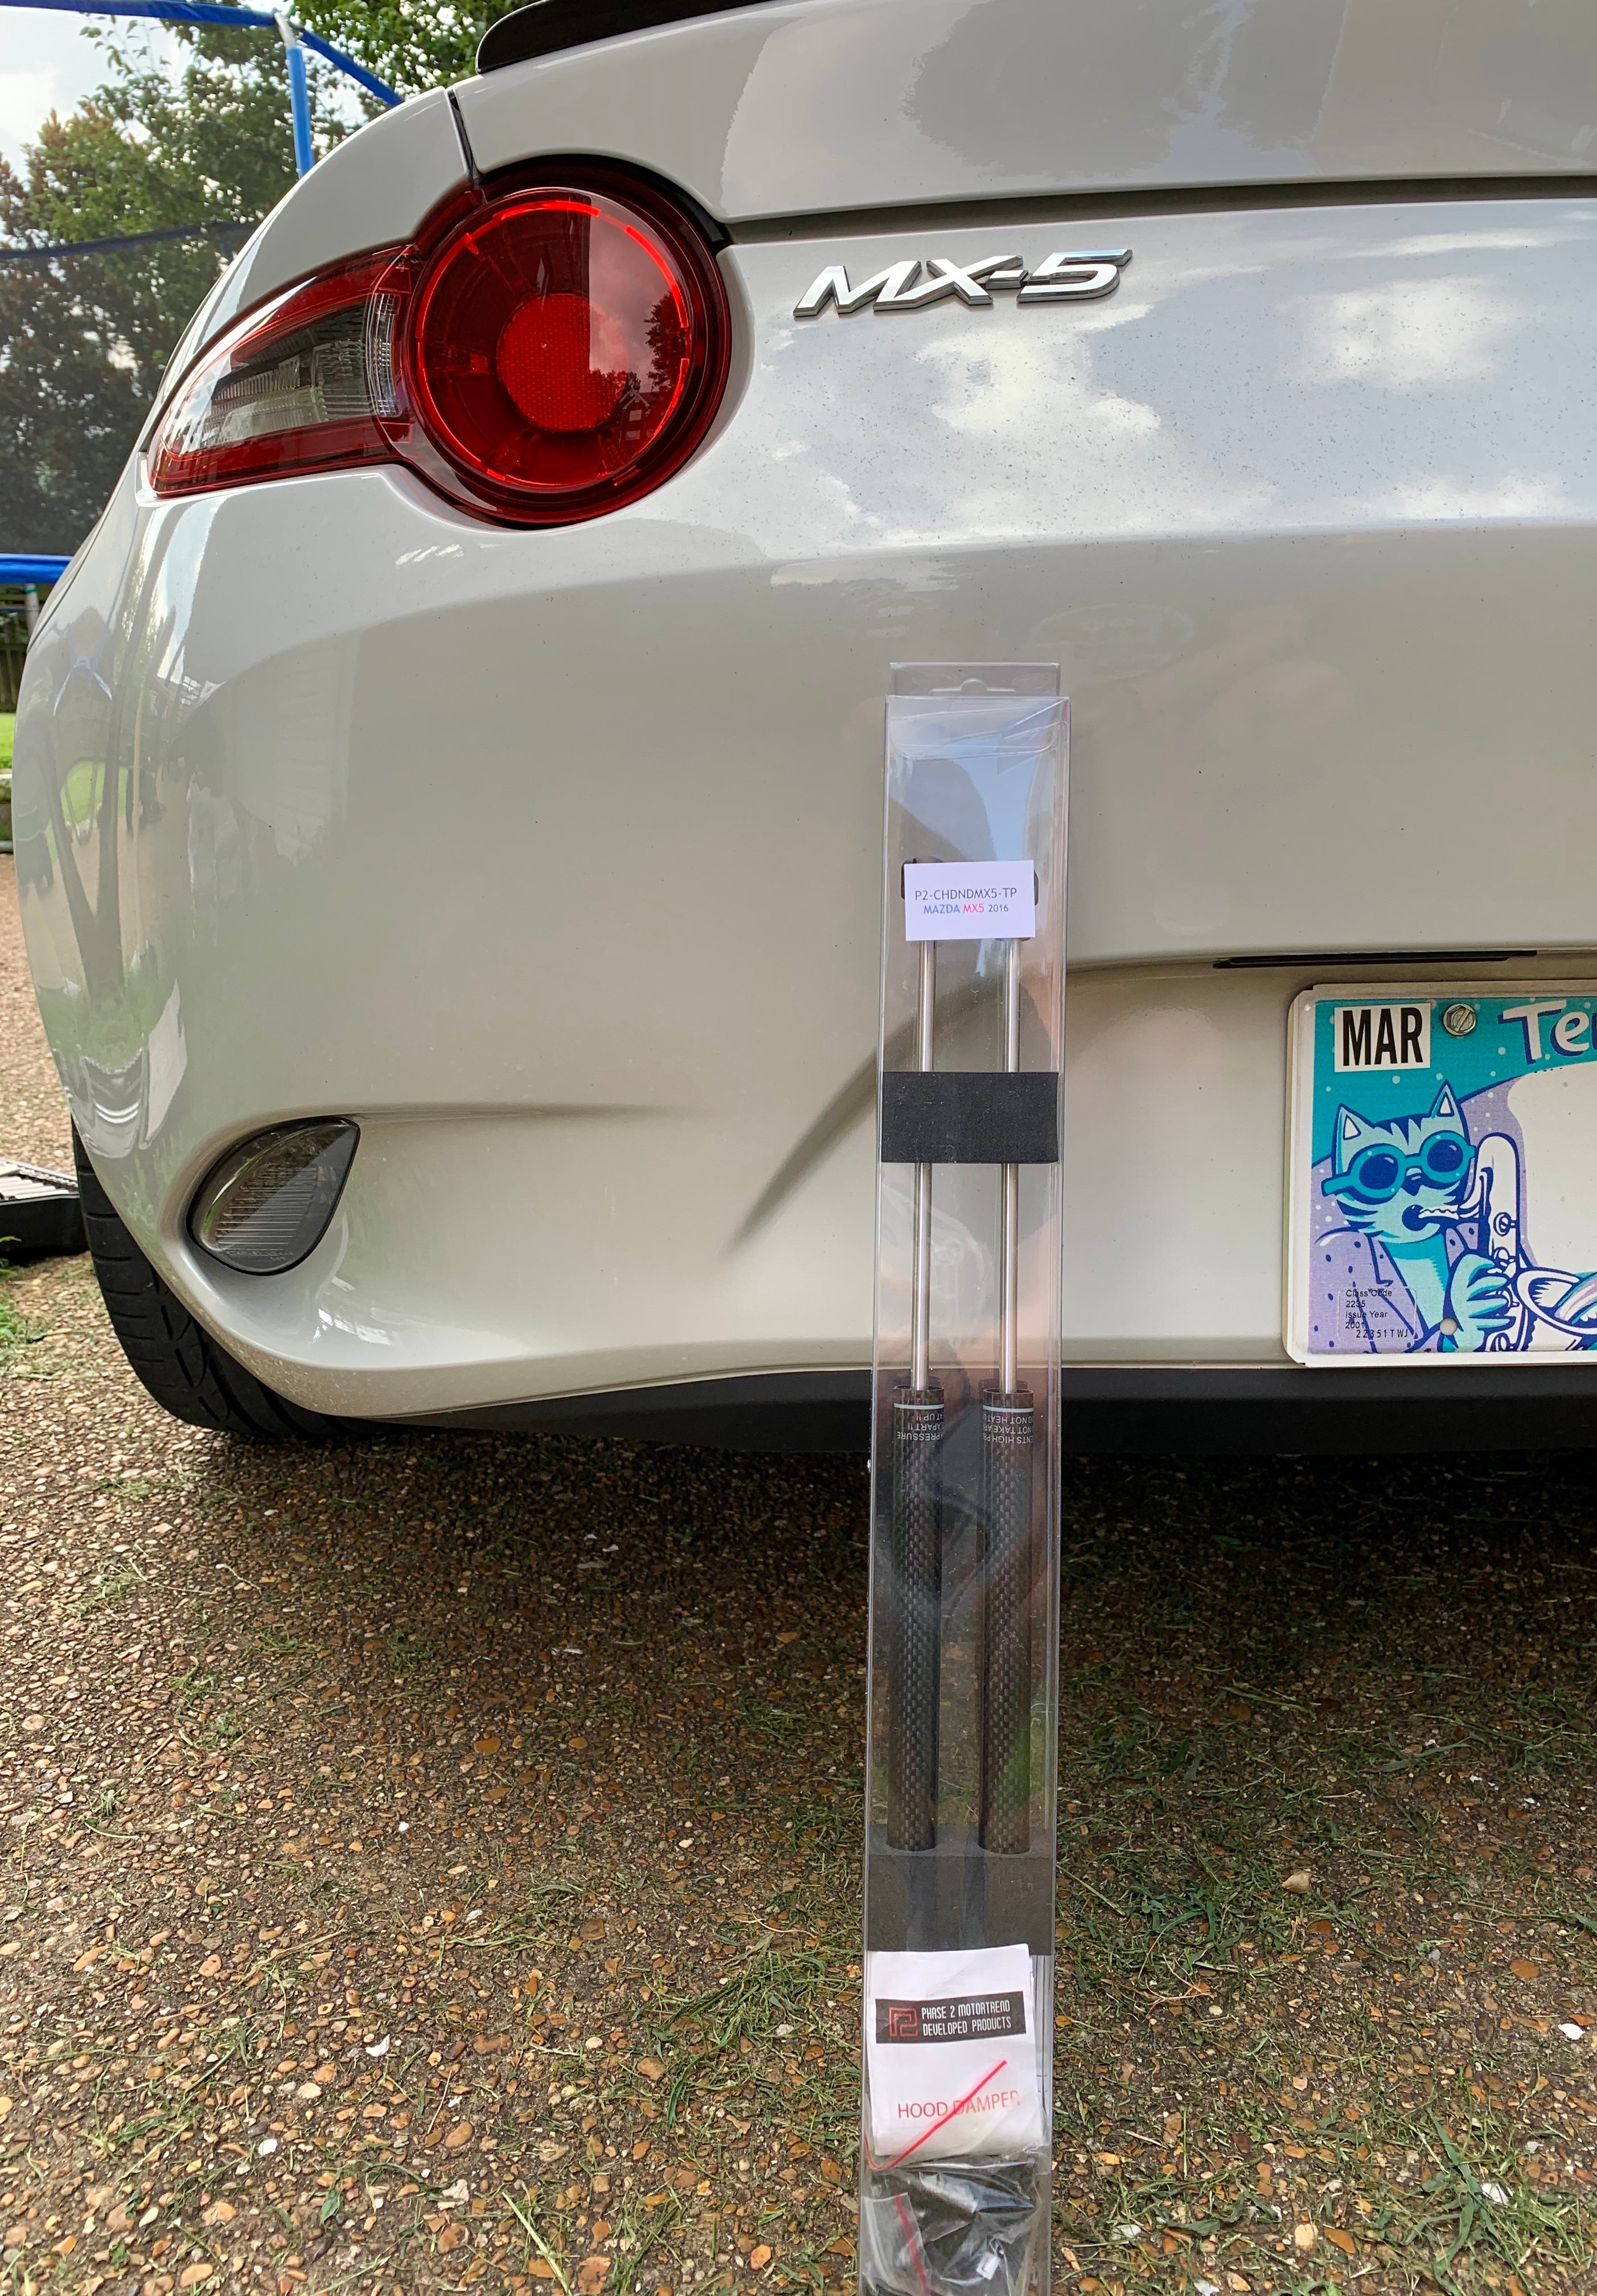
. Super cool dudes over there with some pretty well made stuff! The floor mats, while still essentially new, are holding up well and the new stuff installed here feels pretty nice! They sent me the products shown here in exchange for a review and what not. Don’t want to mislead, but with that said I am extremely happy with the hood struts and would have paid for them outright.
They sent me the !!!error: Indecipherable SUB-paragraph formatting!!! for my 2017 MX-5 RF . They have a couple options on their website, black or carbon. Additionally, there is an assortment of hood strut options for a lot of popular cars. Price point is pretty good and again, the service is fantastic.
Here begins a little how-to.
If you just want to see them installed, scroll down to the bottom
—————————————————-
Not a whole lot needed to install these:
-12mm socket and wrench
-Slim flat head screwdriver
Optional to make things better: a small nail and scissors
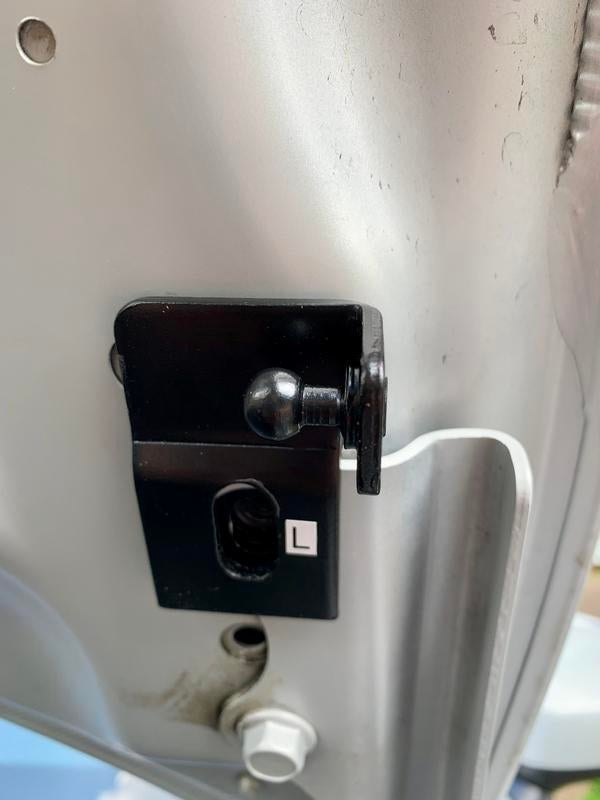
You need to remove the bolts circled in green and red. The blue square is for the optional scissors.

Starting with the green circle, the included bracket has a piece of 3M tape that makes installing on the open hood 10x easier. Bolt back and tighten. That’s the easy side!
hey, look at that - I cleaned up a little before slapping the bracket on
Flipping to the red circle side, I found that installing the bracket, but leaving the bolt a little loose made negotiating the strut installation easier.
Bolt is not quite tight so there is a little room for movement from the bracket during the install
The flat head screw driver slips in behind this clamp on the head on the strut. It will put the claws inside the head out so you can slip it over the ball on the bracket. Start with the body of the strut going on the hood side.
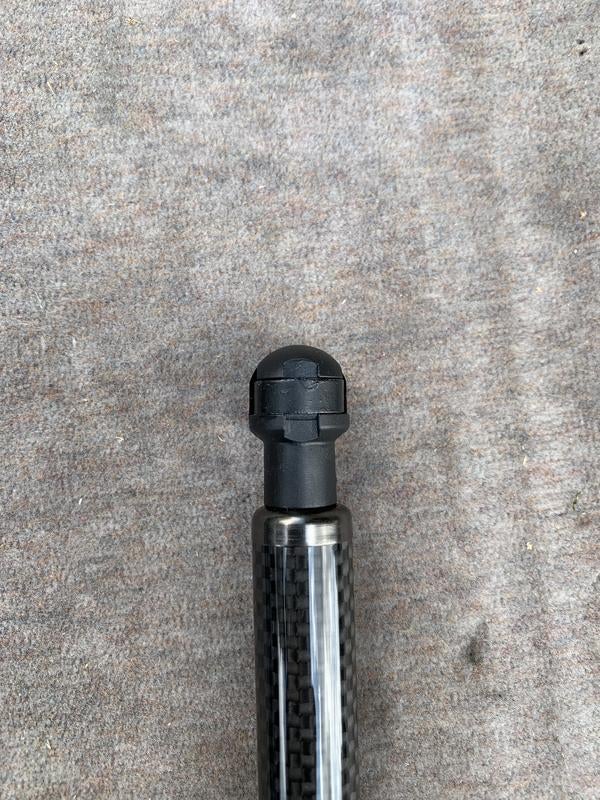
There are small indentions in the socket piece to slip the screw driver in
Here is where things get a little...sketchy. Getting the clamp to open, pushing the strut in a bit, and popping it on the socket on the fender side of things proved difficult. So I took the head of the strut off (it just unscrews) and slid a small nail in to the clamp so that it would stay open while man handling the strut in to place.
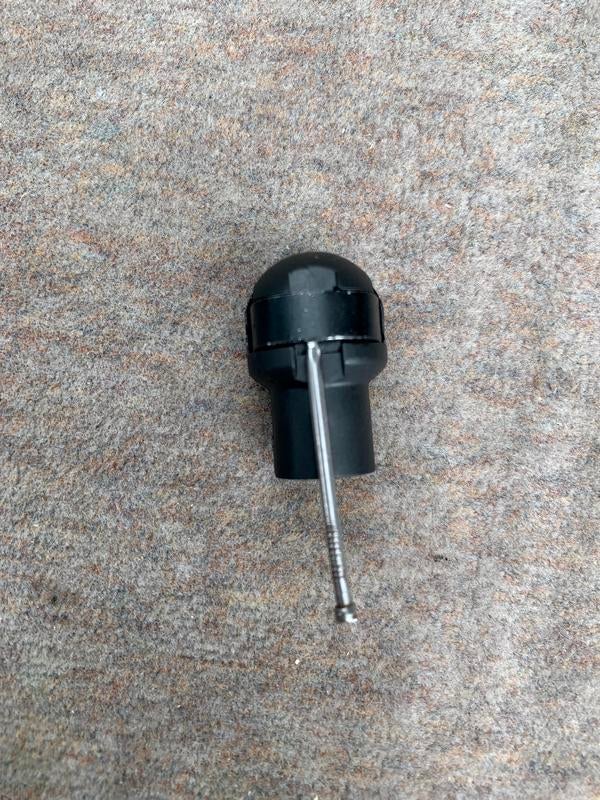
I think this is one of those, it’s only stupid if it doesn’t work moments?
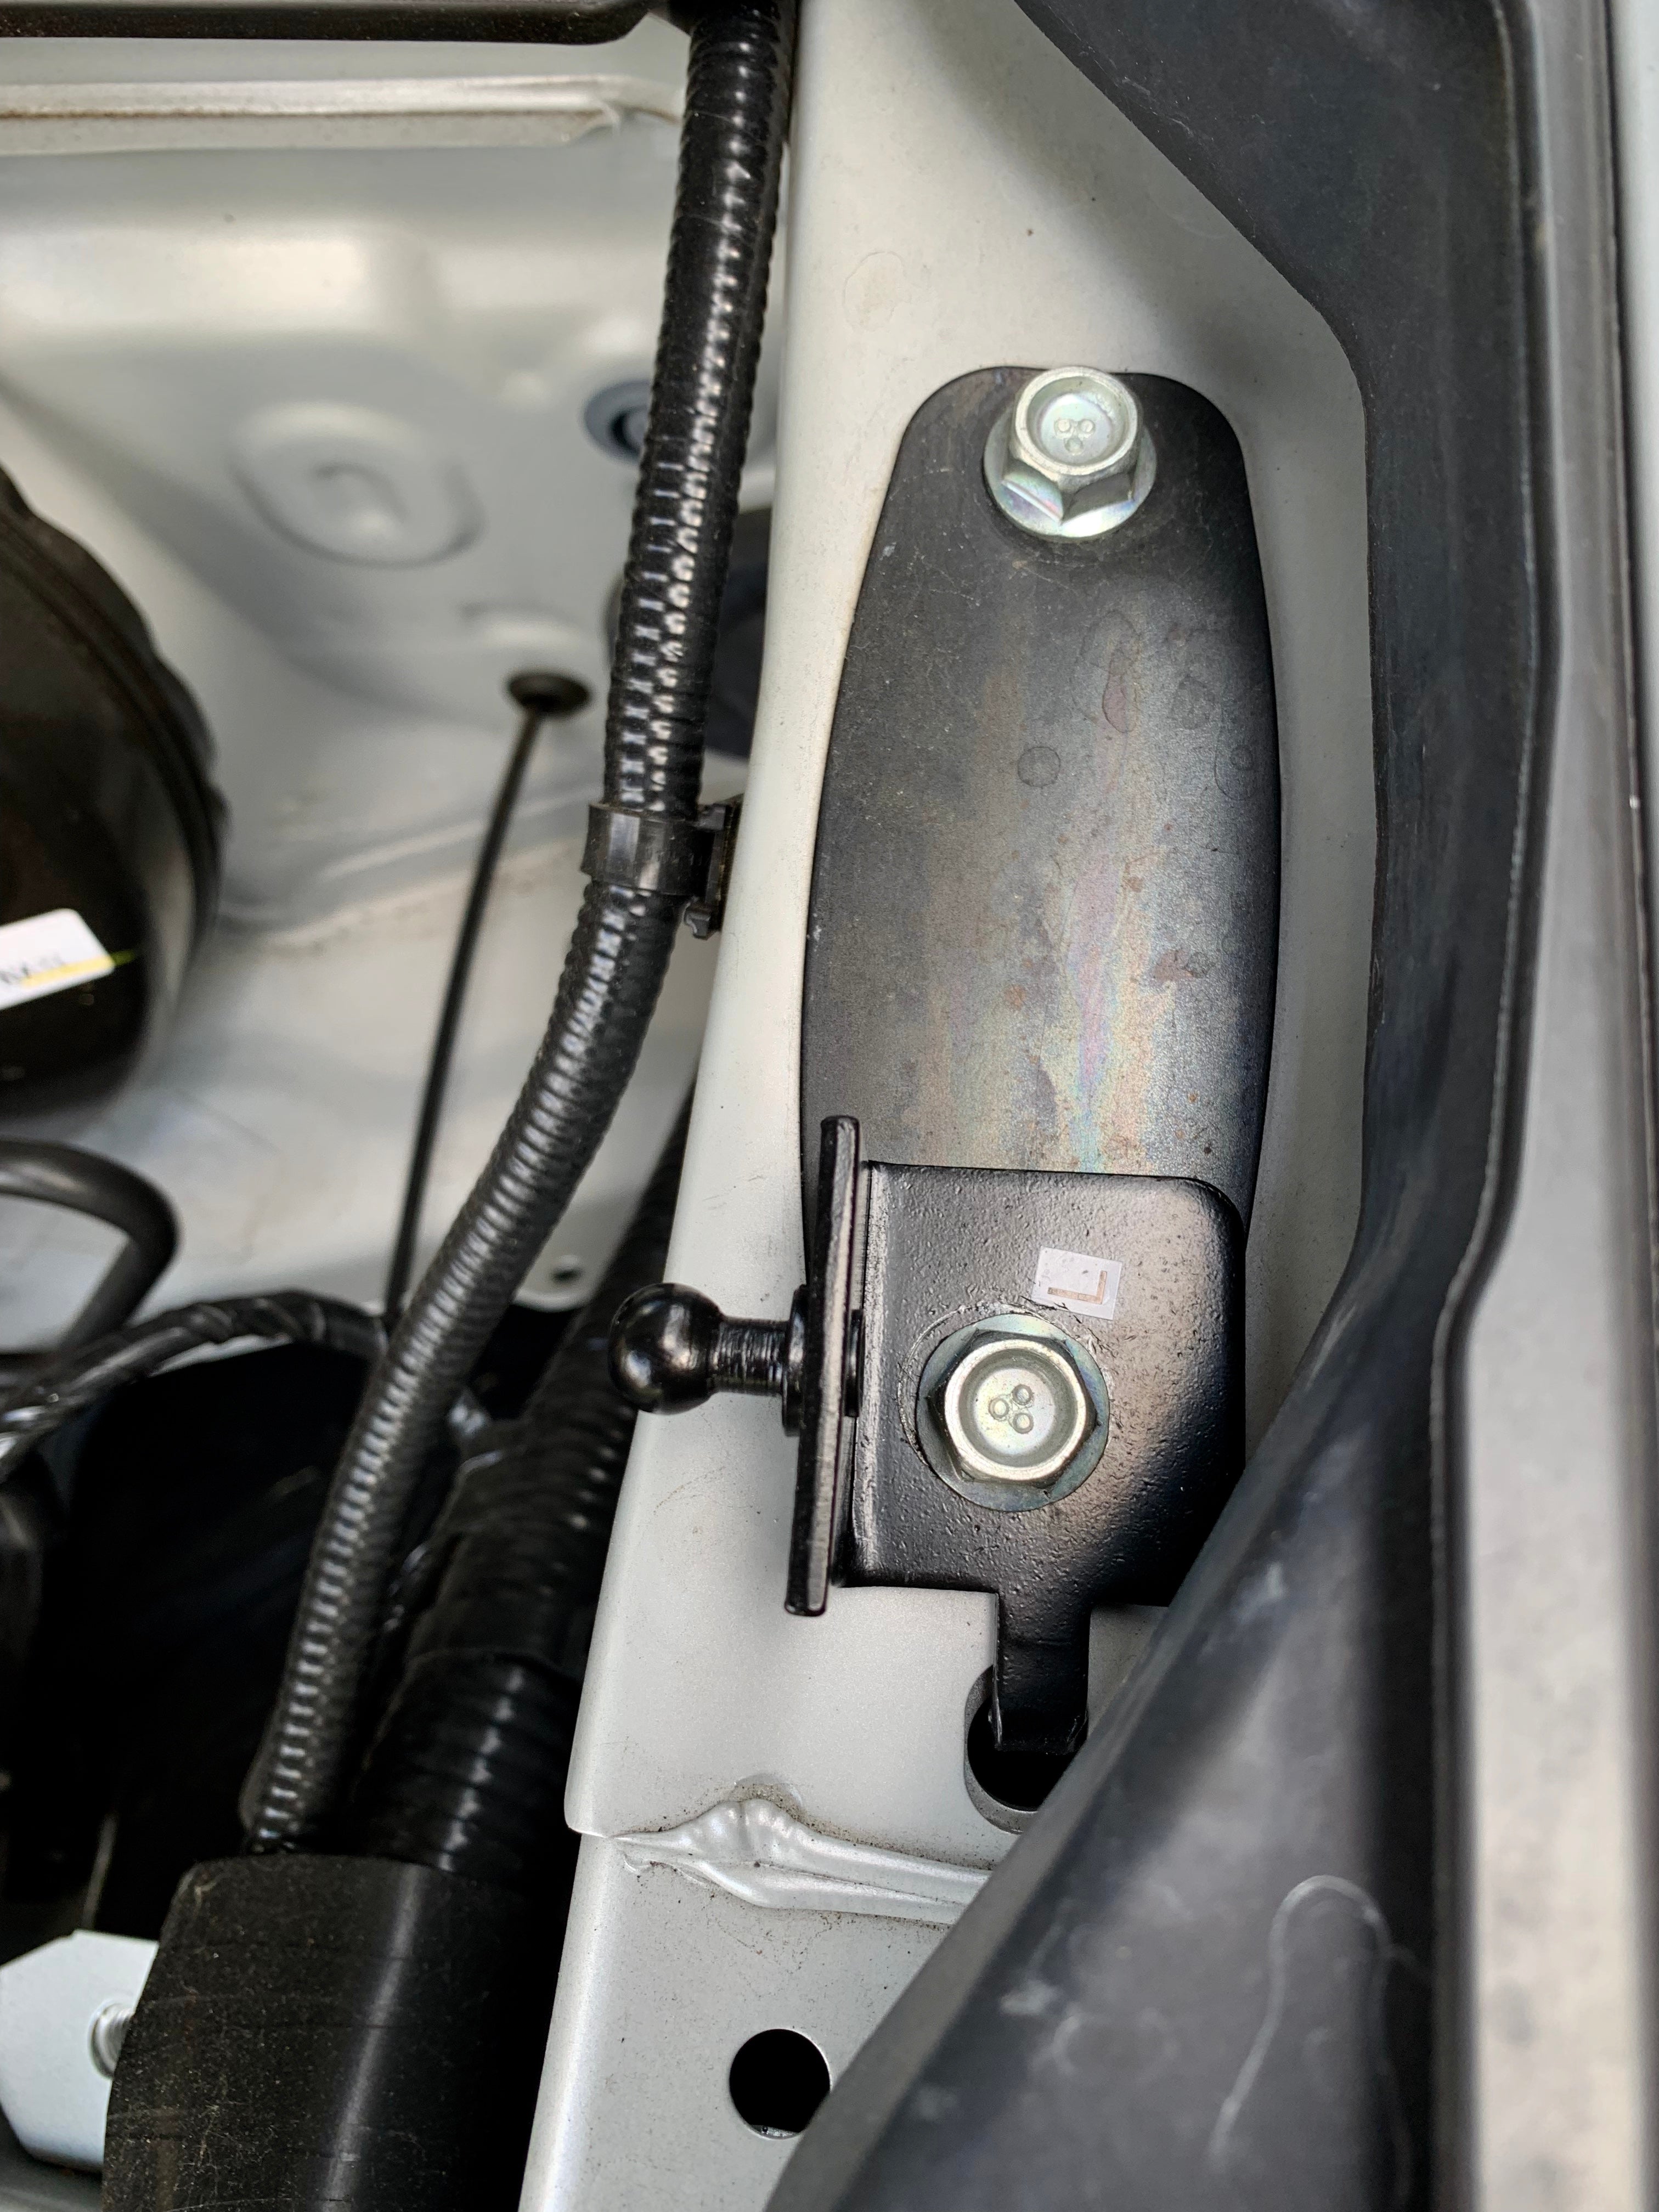
Don’t forget to tighten the bolt for the fender bracket. First one on!

You’ll notice that the strut is perfectly in line with where that blue square was from the earlier picture. This is optional as the rubber is soft and squished down with the strut coming down on it, however I think it’s a little cleaner to grab some scissors and trim off about a half inch or so.
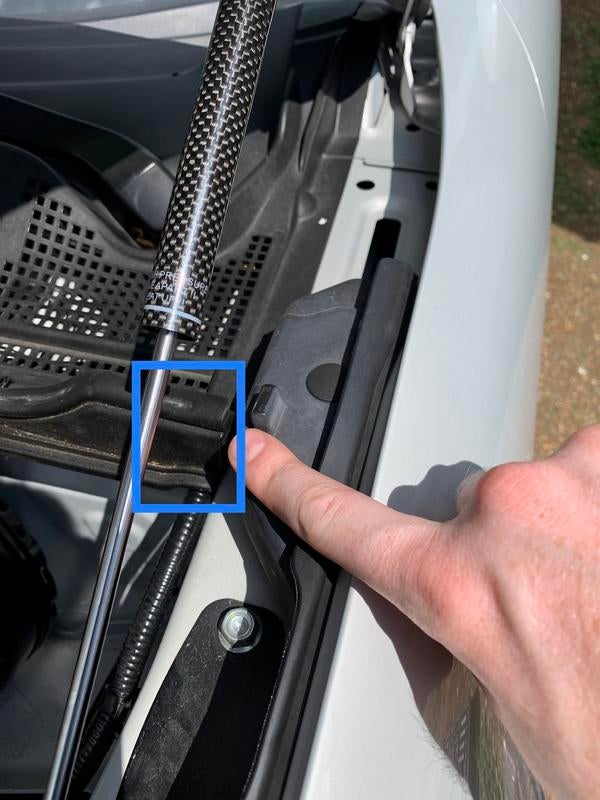
Nice hand, I know
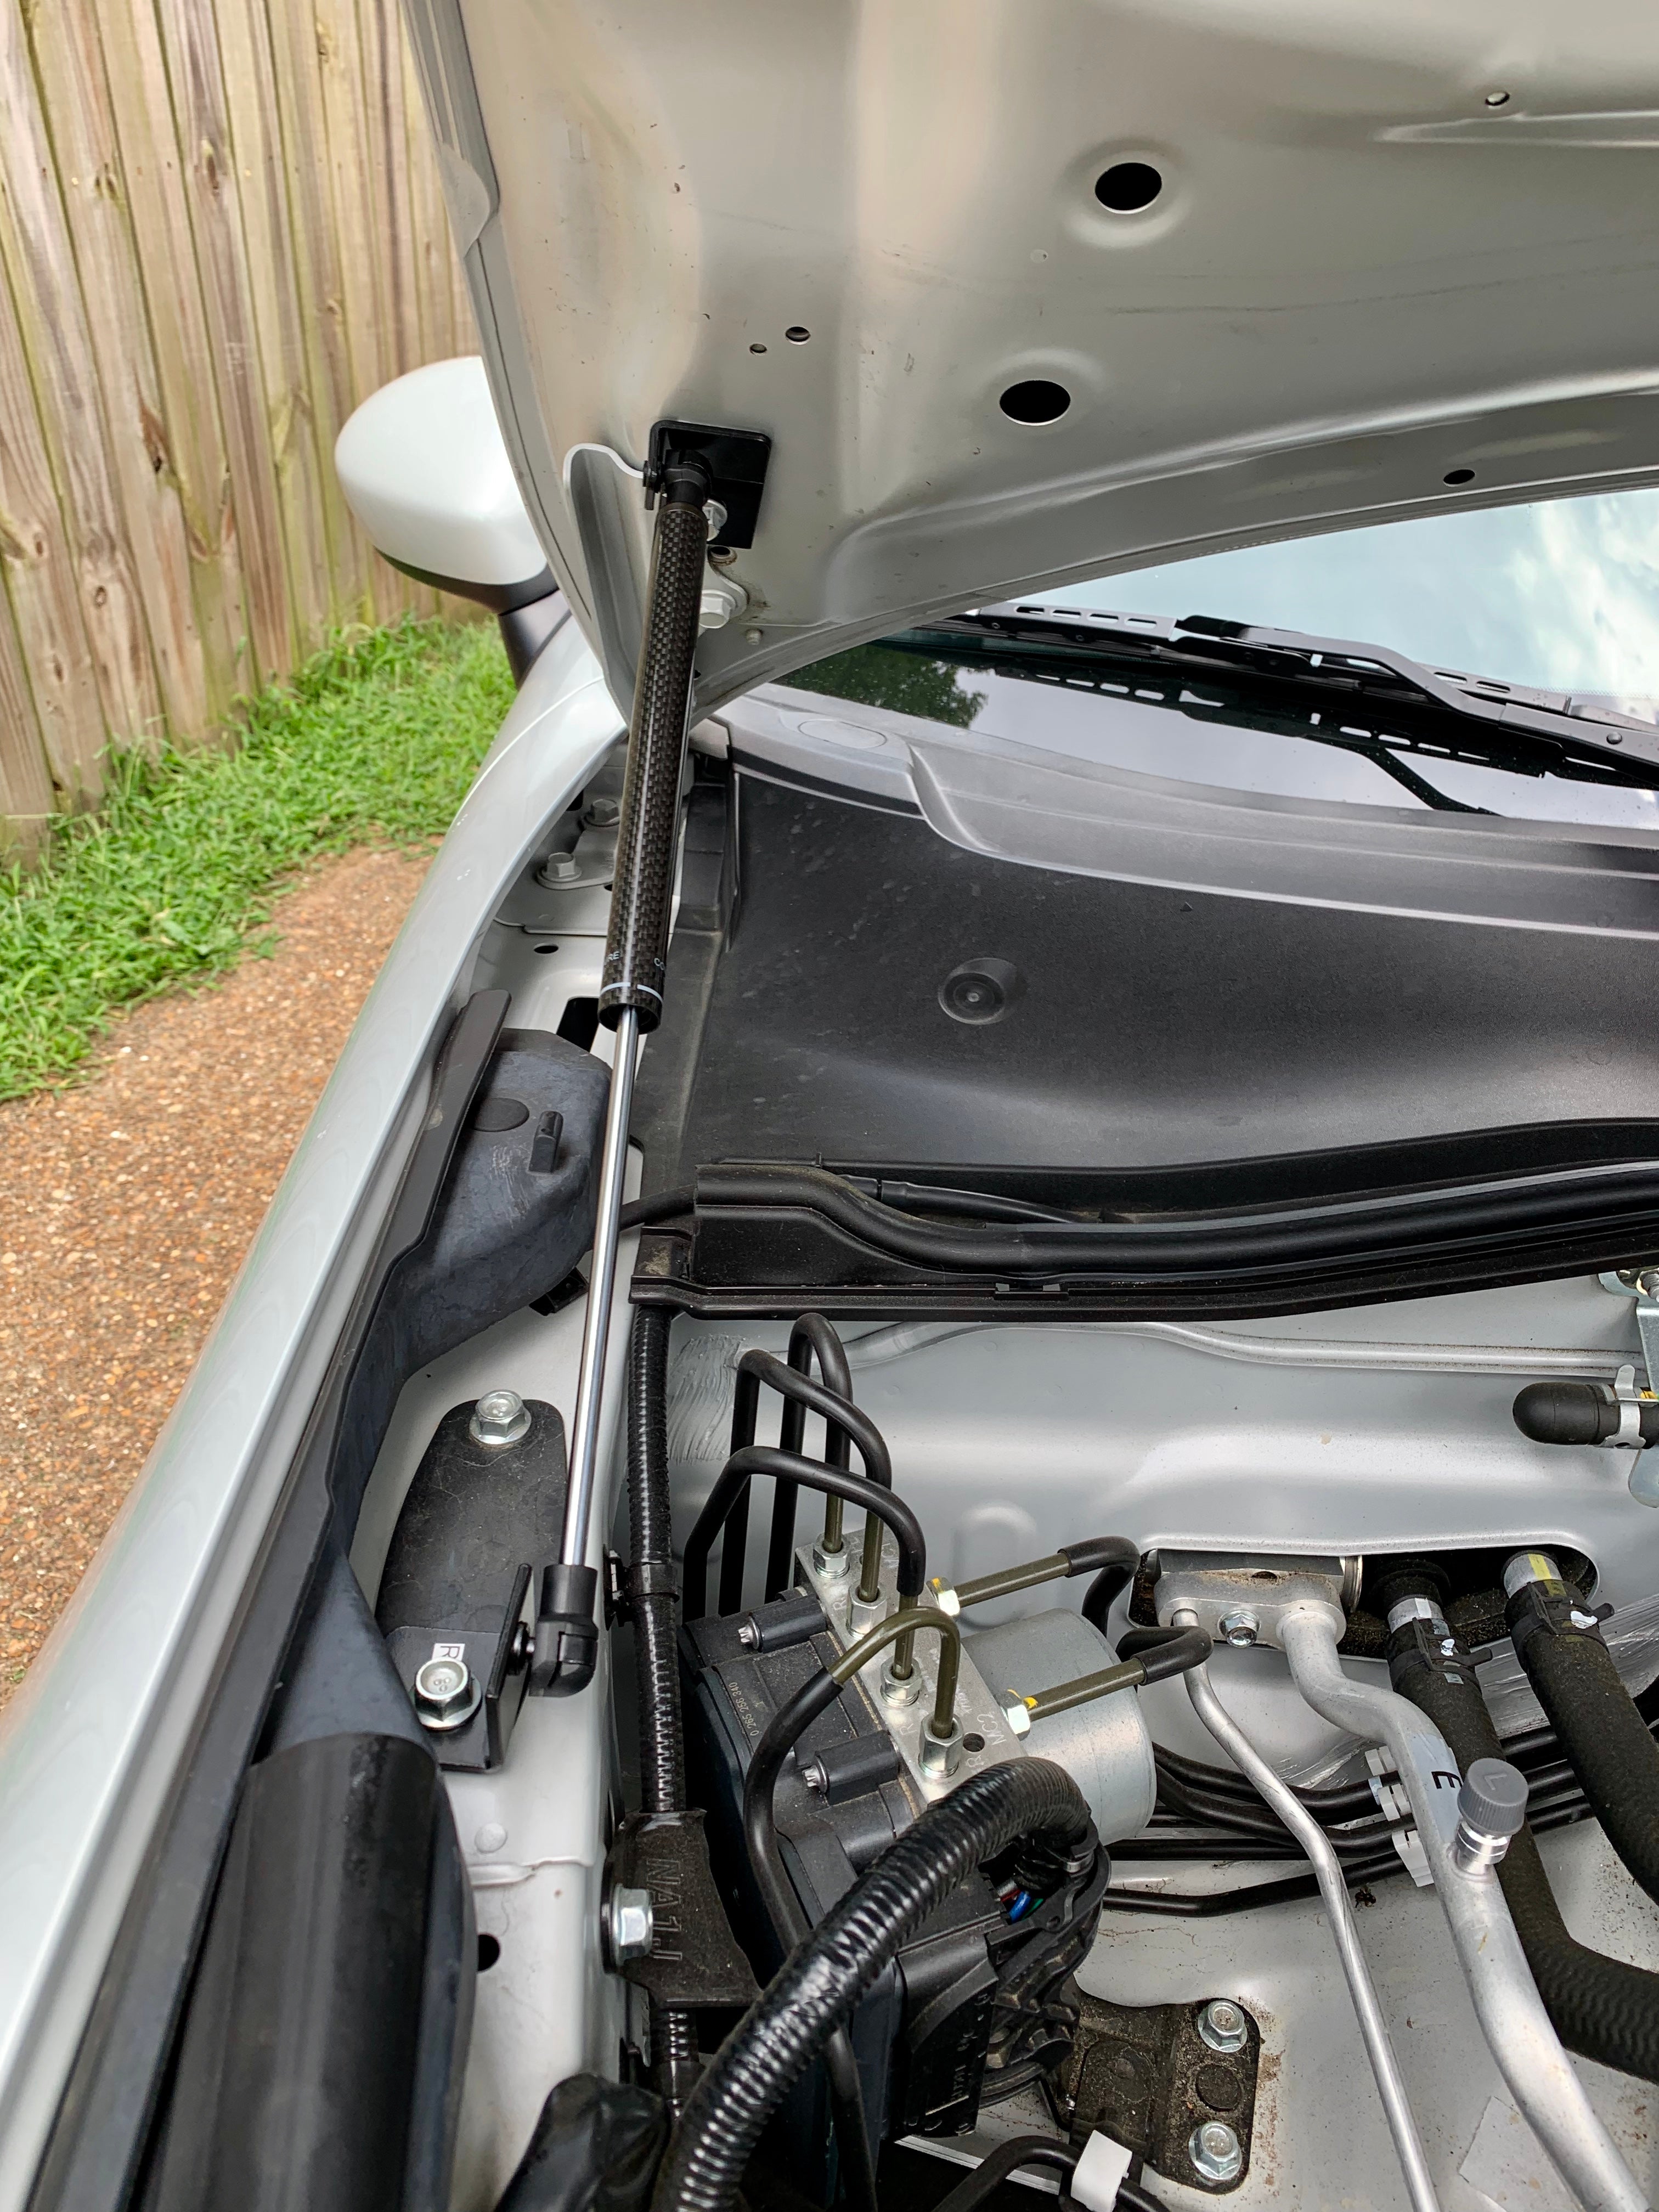
Repeat the same process for the other side and you’ve got working hood struts!
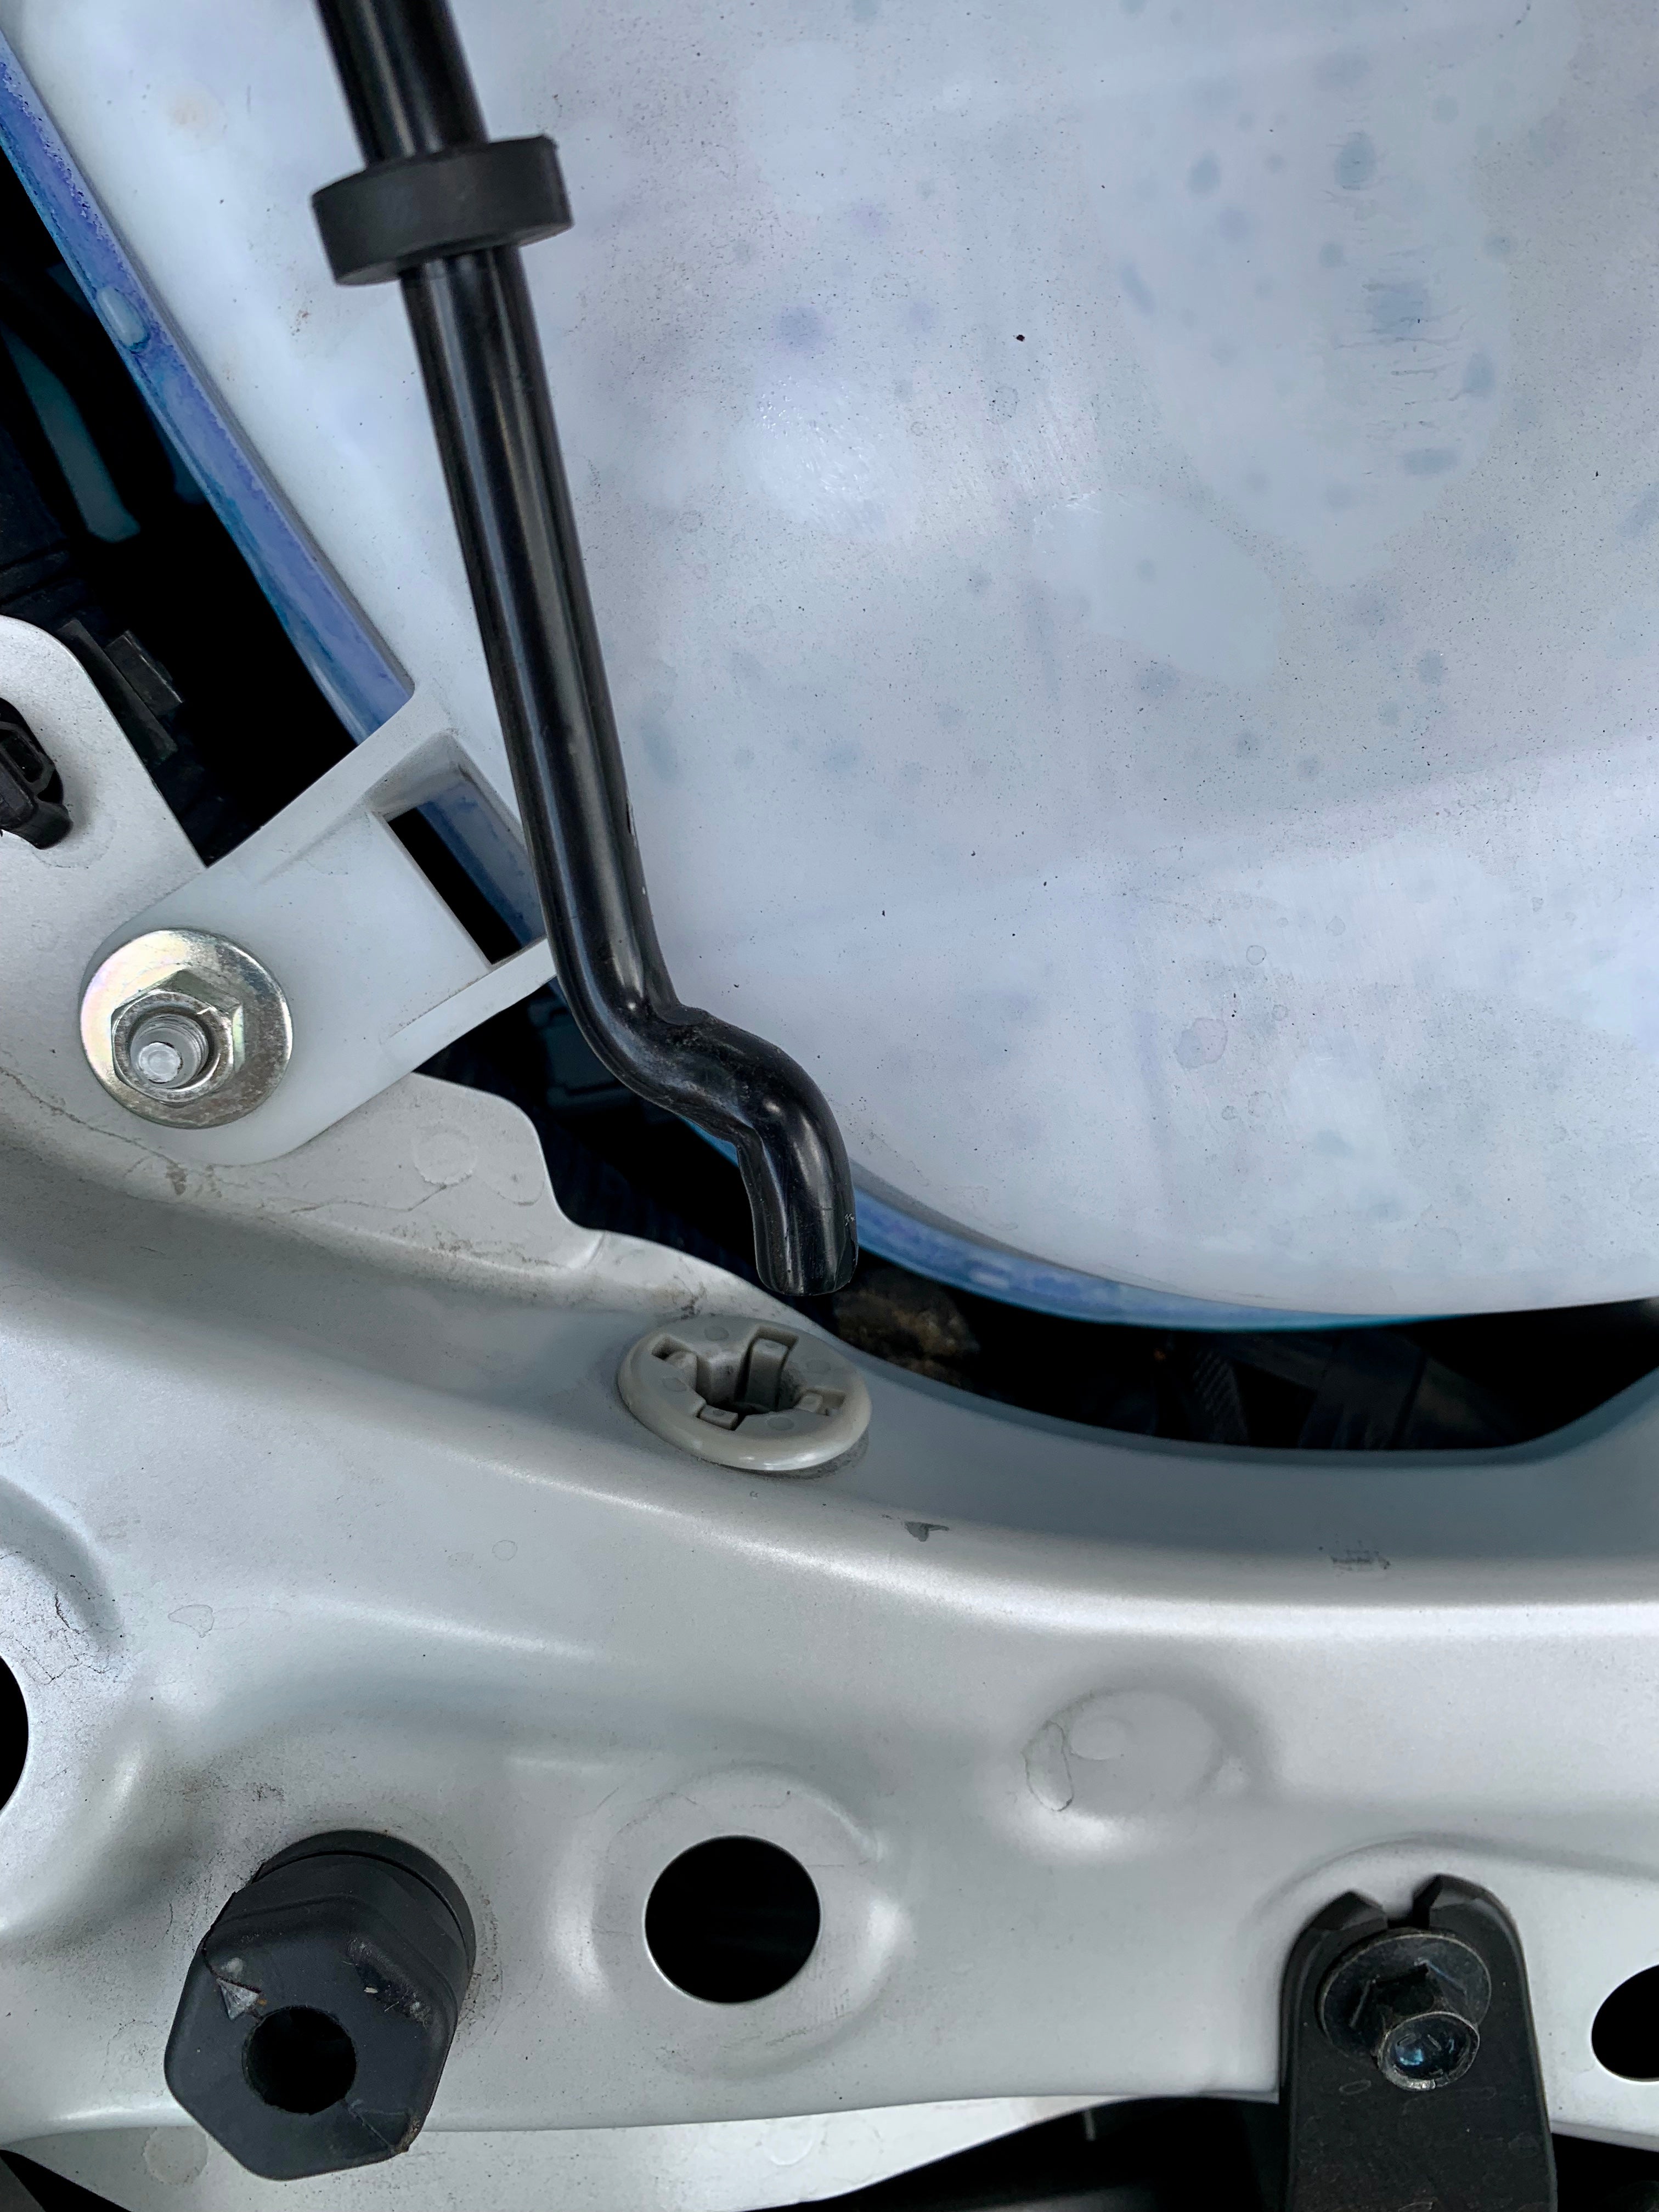
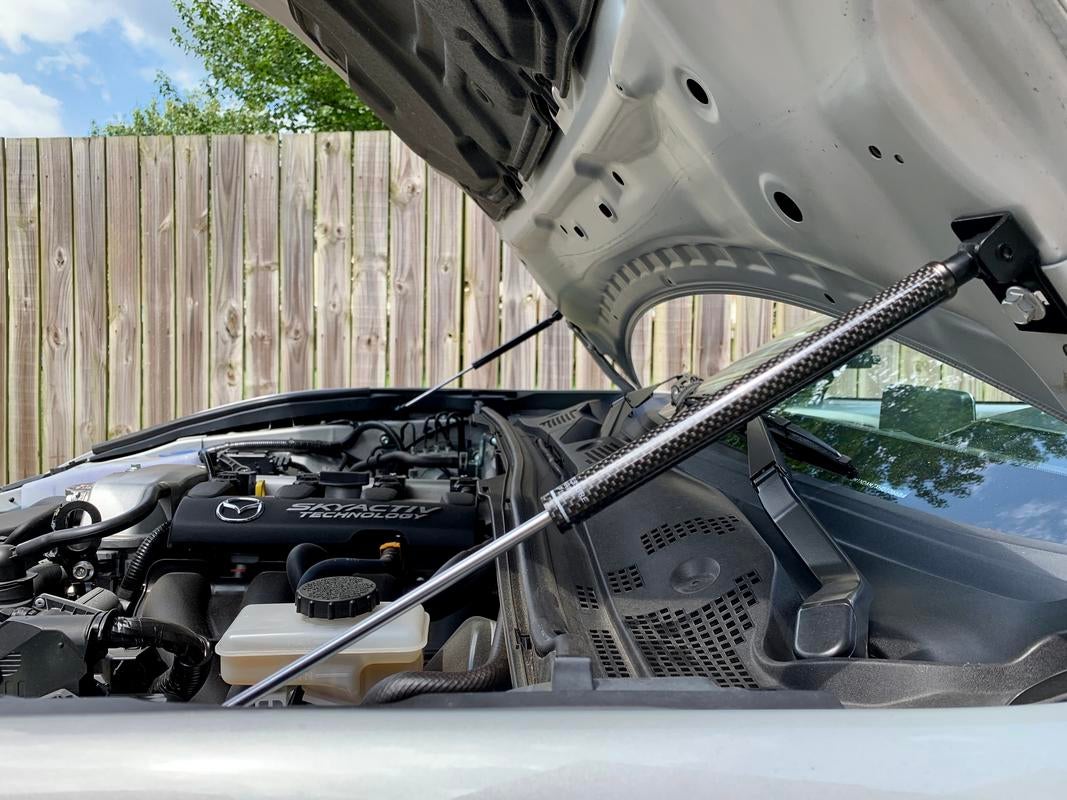
Last optional piece here, remove the OEM hood prop for uhhhhh weight savings? Or really, because it just looks a lot better.
The OEM prop takes a little fandangling, but twist it towards the back left corner of the engine bay and it should slide out.
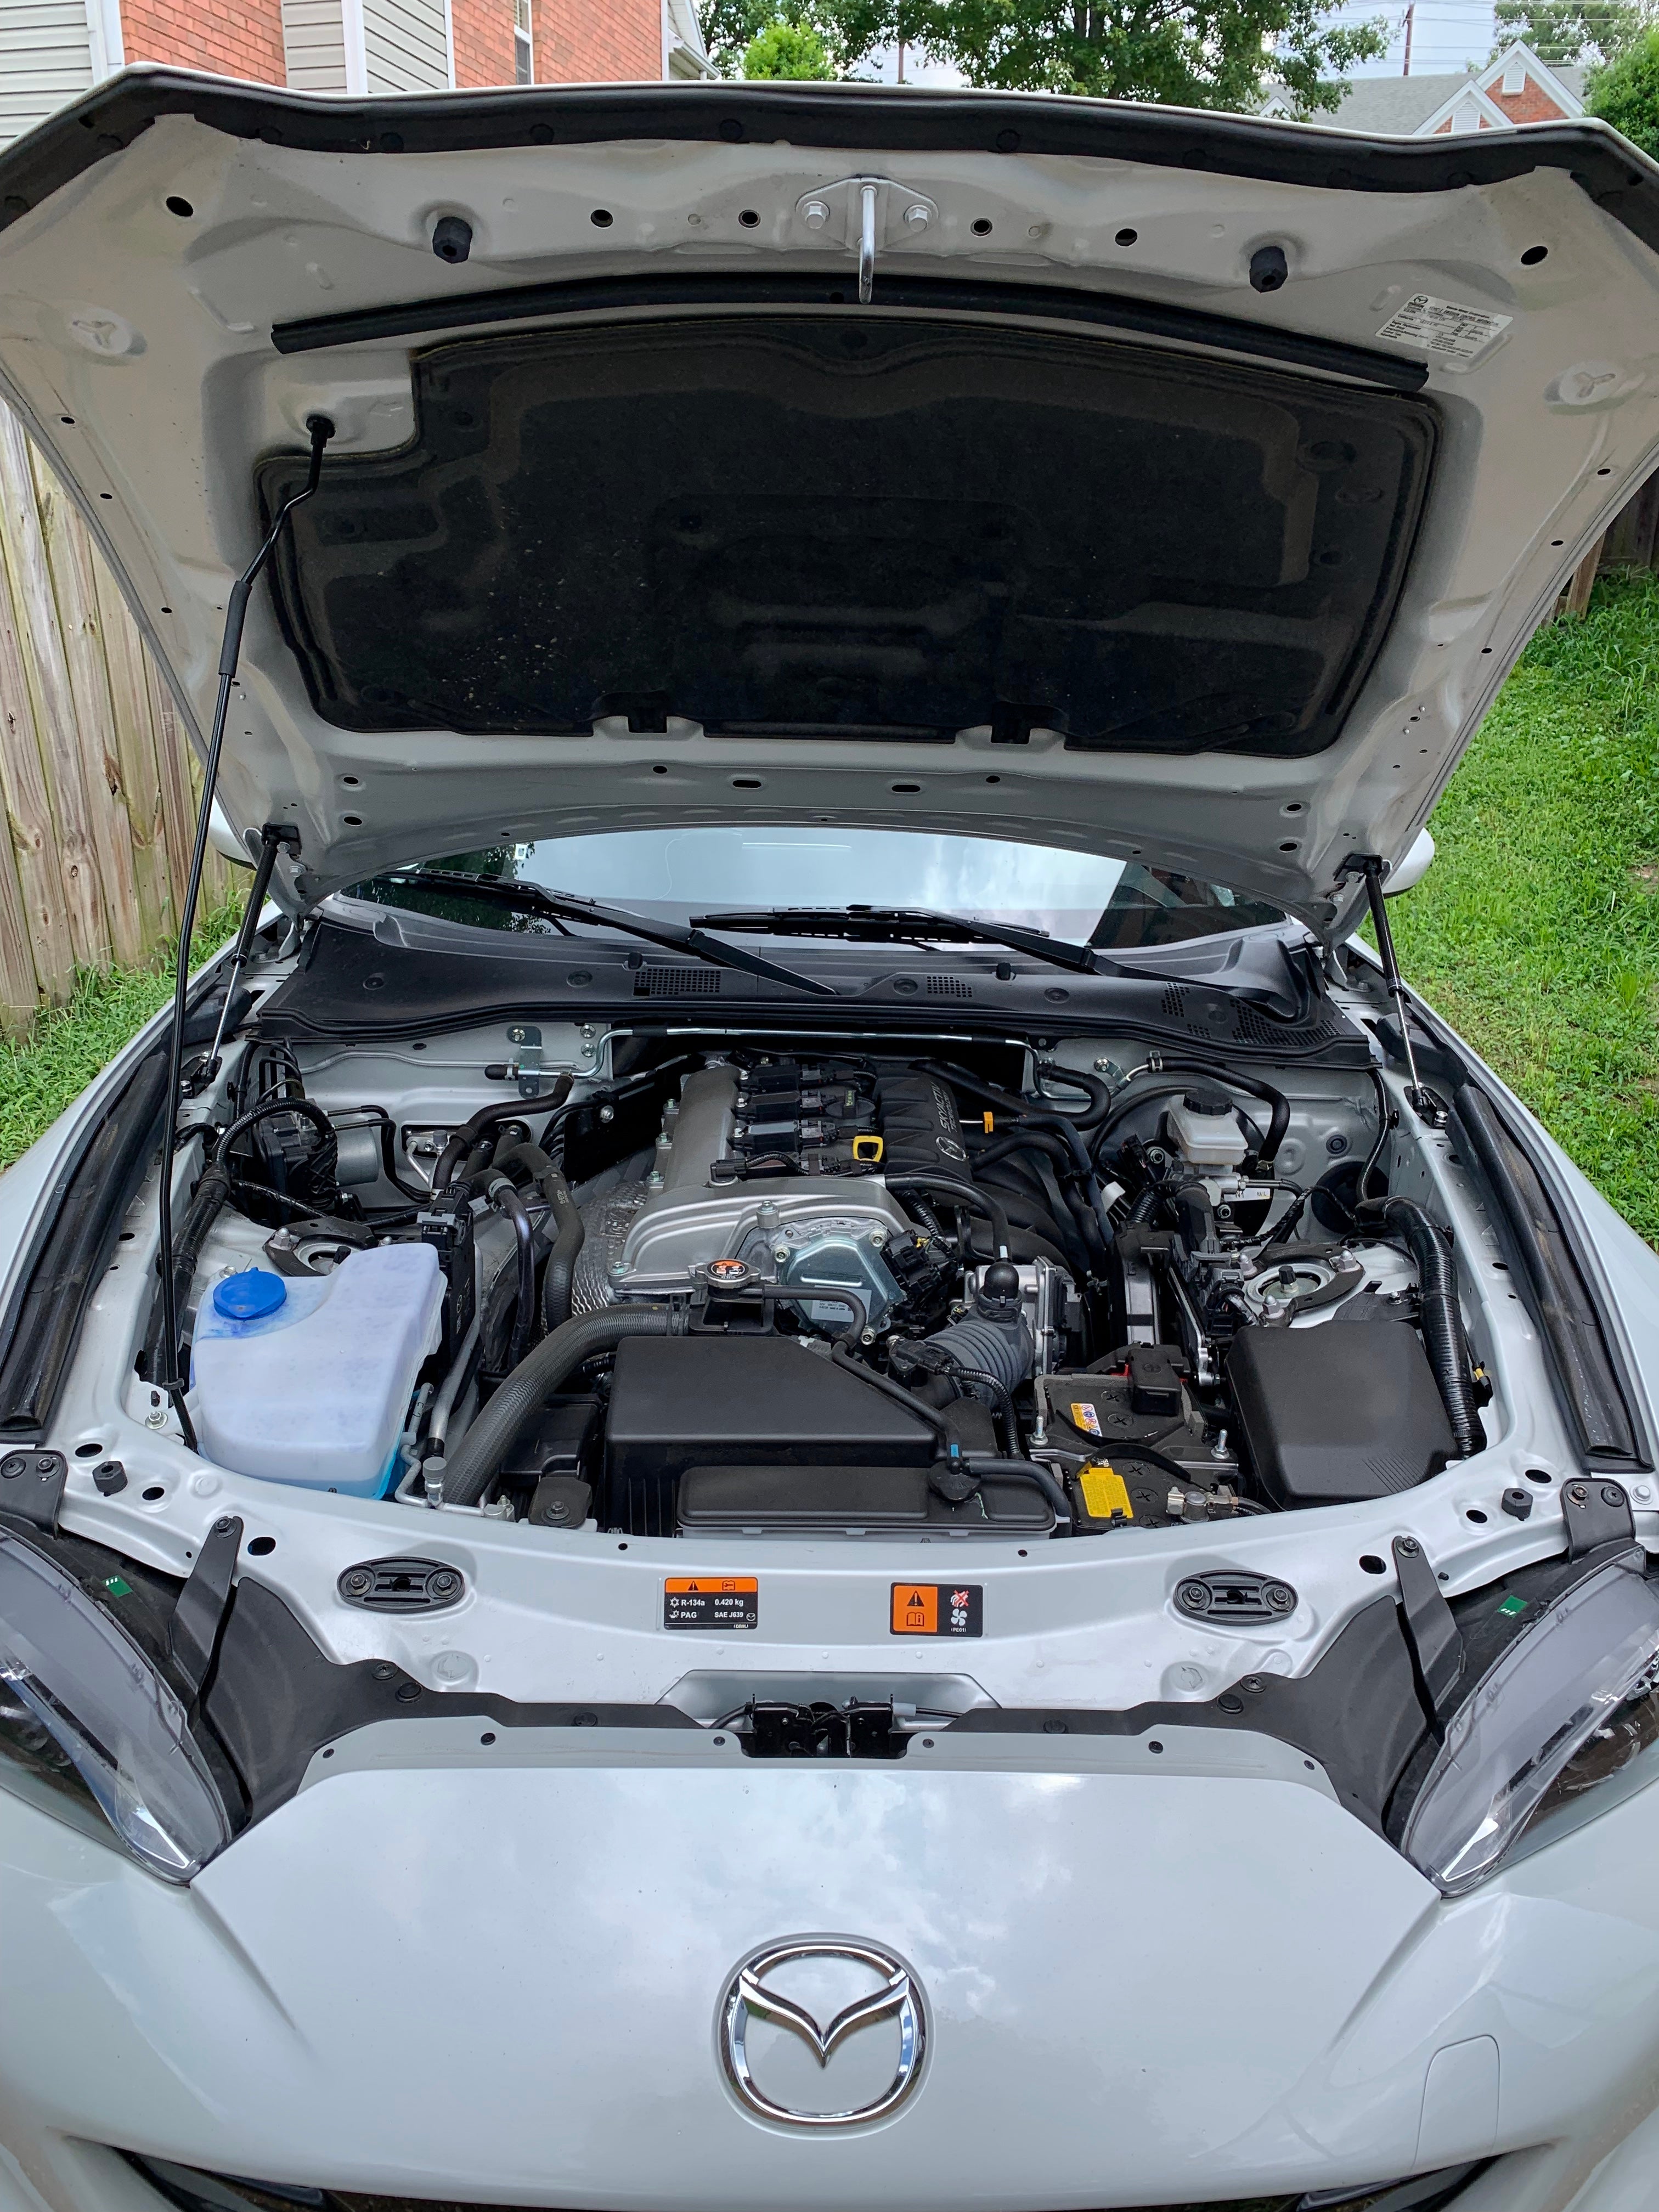
And cleanly stays open on its own now! I am a very big fan.
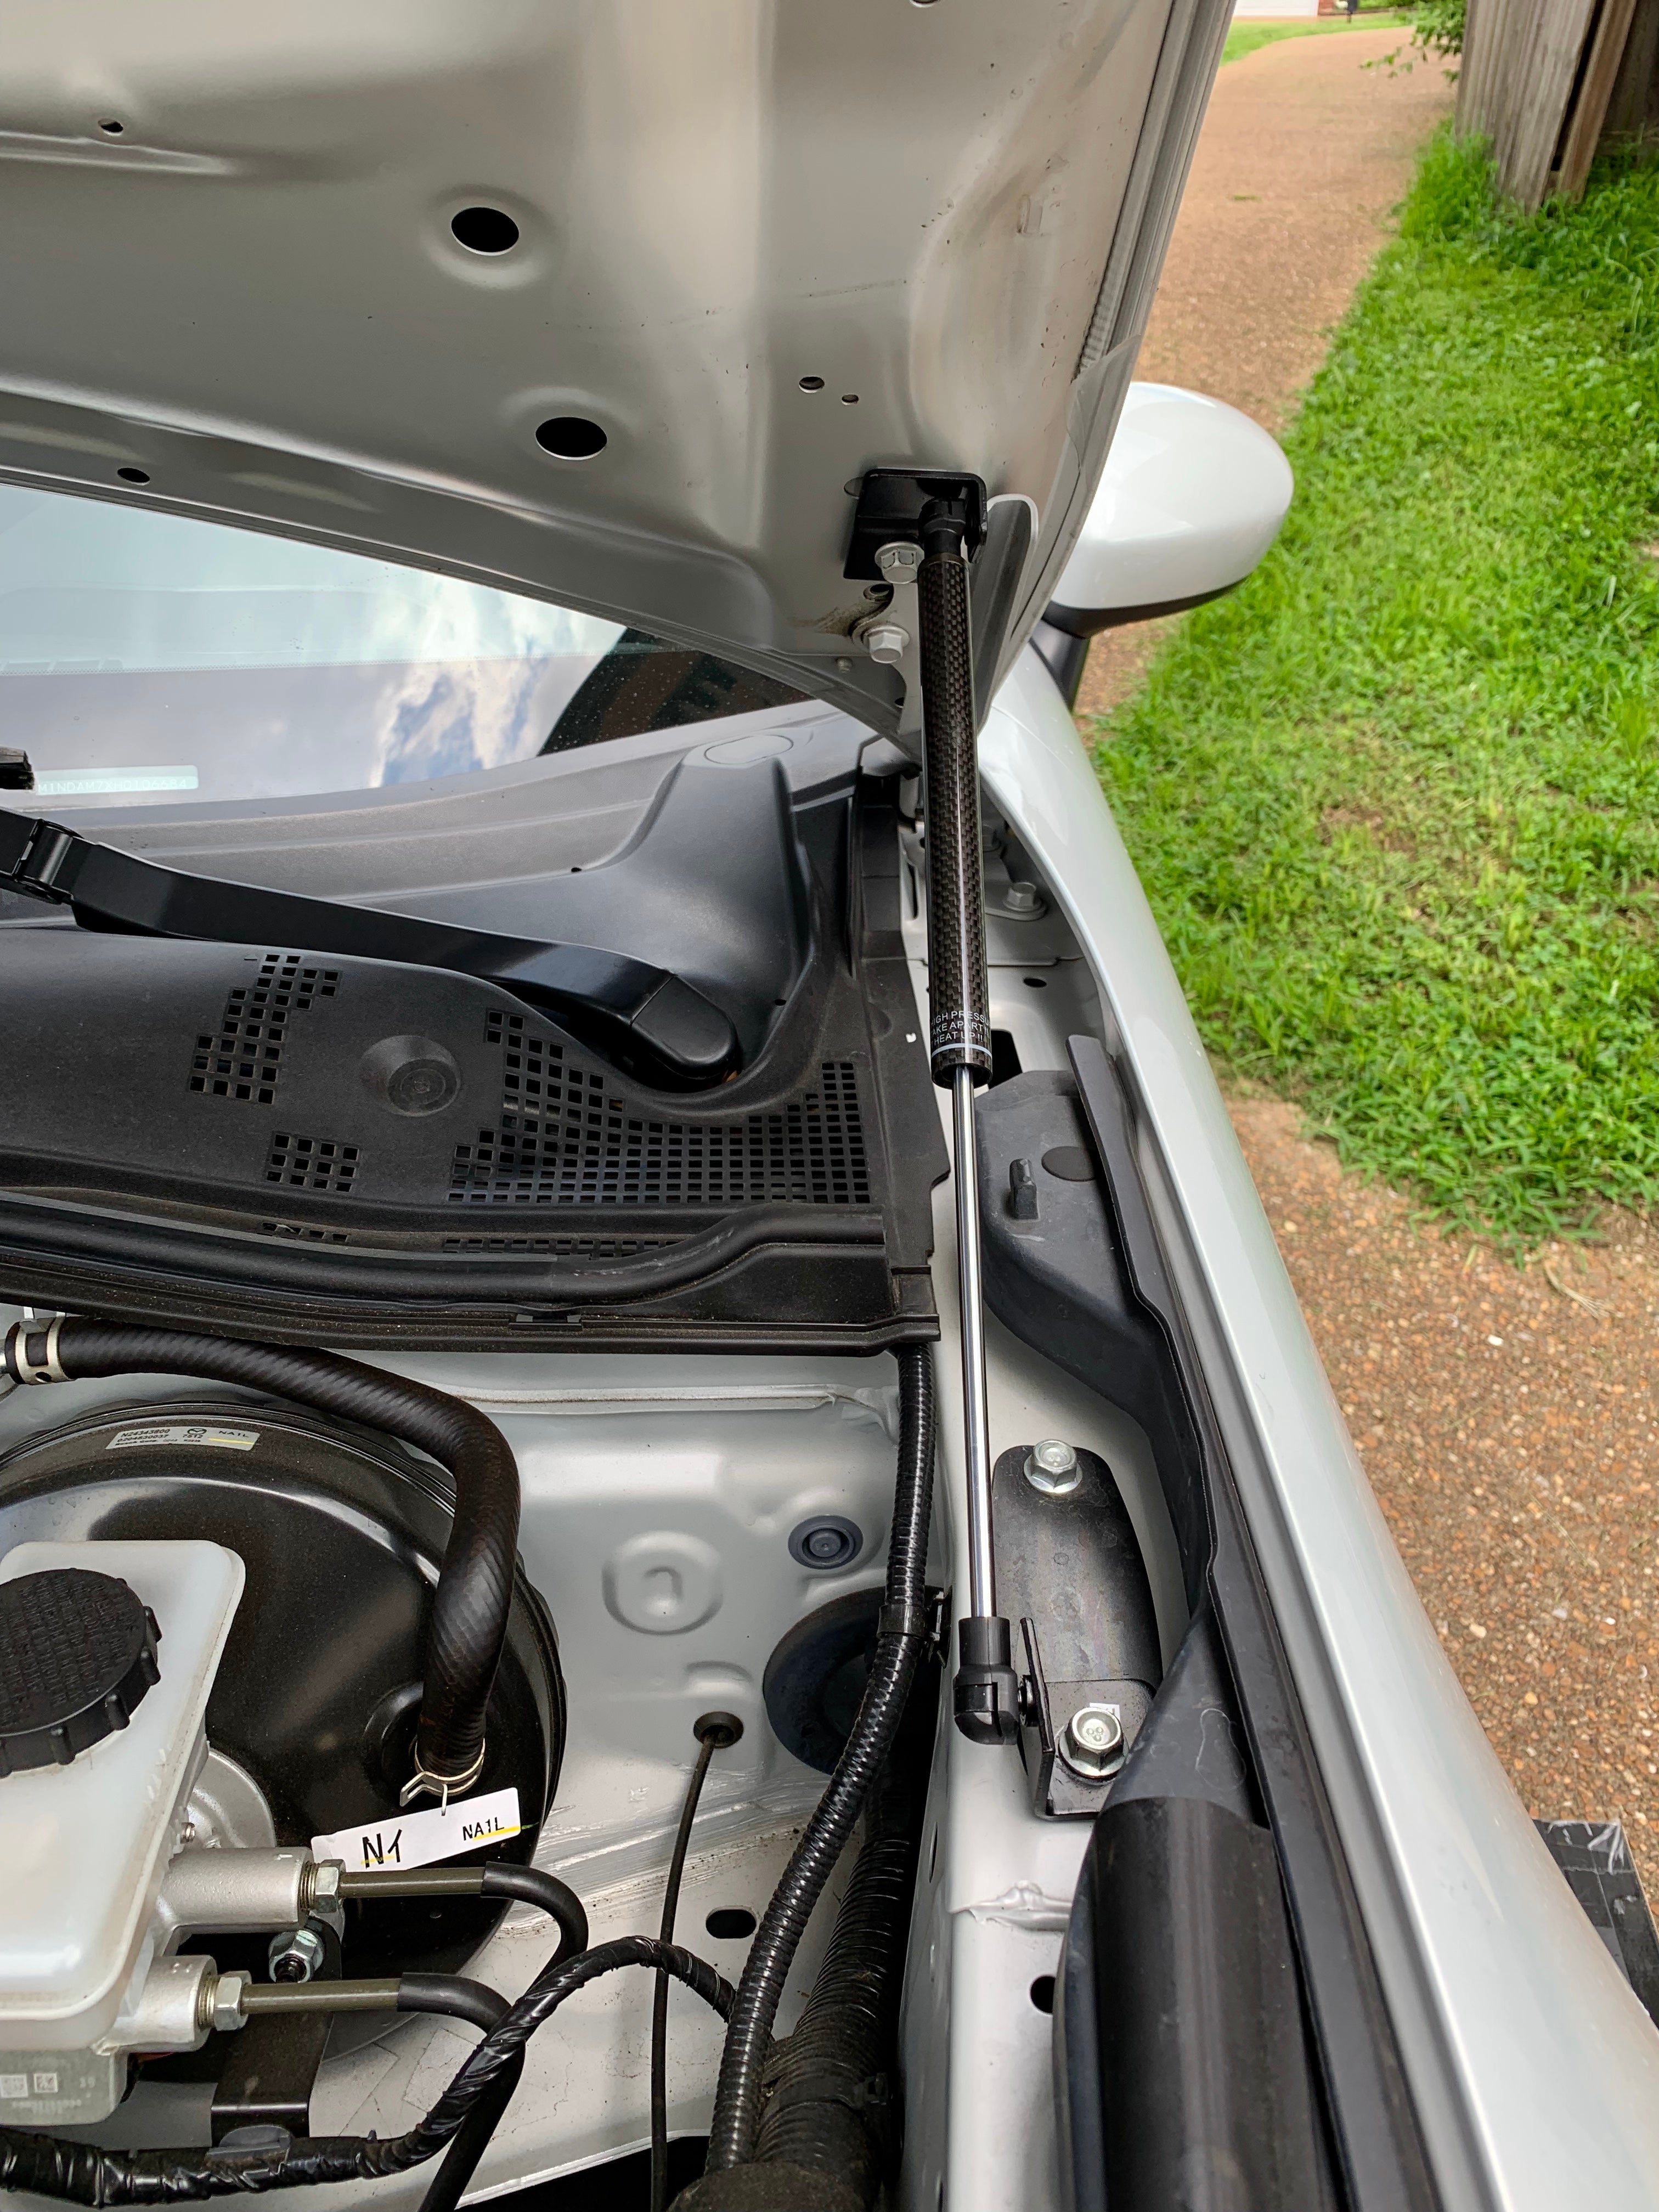
Thank to P2M for sending me these! I am extremely happily with them. Easy to install and I appreciate the made to fit brackets. If you check out their site, you can see they have specific sets for each car they carry.
 Arrivederci
> TysMagic
Arrivederci
> TysMagic
08/14/2019 at 16:06 |
|
I did the Grimmspeed struts on my old BRZ, it’s definitely worthwhile to install them over the prop rod and is great at shows to open up the engine bay a bit more if you’re into that sort of thing.
This looks like a cleaner install than what I had, so props to those guys on a nice design!
 Milky
> TysMagic
Milky
> TysMagic
08/14/2019 at 16:07 |
|
Looks heavy.
|
TysMagic
> Arrivederci
08/14/2019 at 16:09 |
|
props to those guys - i see what you did there
|
TysMagic
> Arrivederci
08/14/2019 at 16:10 |
|
Truly, I had them on the want list even though I don’t open the hood at shows (I also barely even go to CnC anymore) and I don’t really get under there a lot. It just felt like something it should have for some reason
|
TysMagic
> Milky
08/14/2019 at 16:11 |
|
I was doing some curls with them before install. Feelin’ swole
 Spanfeller is a twat
> TysMagic
Spanfeller is a twat
> TysMagic
08/14/2019 at 16:18 |
|
An engineer in Japan (or California?) is crying as they read
|
TysMagic
> Spanfeller is a twat
08/14/2019 at 16:20 |
|
V likely - their precious prop replaced by some dingus with too much time on his hands
|
Spanfeller is a twat
> TysMagic
08/14/2019 at 16:22 |
|
I think it was on top gear that they mentioned a 140 gram weight saving on the rear view mirror so... yes
|
Milky
> TysMagic
08/14/2019 at 16:25 |
|
Enough reps of anything will get ya jacked.
|
TysMagic
> Spanfeller is a twat
08/14/2019 at 16:34 |
|
I hadn’t considered this much, but I would almost suspect that was on the club and not the fat boy GT.
 Khalbali
> TysMagic
Khalbali
> TysMagic
08/14/2019 at 19:39 |
|
Looks awesome! Didn't even know those were a thing but great job.
 seoultrain
> Spanfeller is a twat
seoultrain
> Spanfeller is a twat
08/14/2019 at 20:51 |
|
If they cared so much about weight, why have the stock hood prop so long and at the front of the car? Why not a short one further back?
|
Spanfeller is a twat
> seoultrain
08/14/2019 at 21:12 |
|
Cross platform compatibility?
|
Arrivederci
> TysMagic
08/15/2019 at 08:03 |
|
It’s also sort of one of those things that’s the way it *should* be that makes it so worthwhile.
 Oppenheimer - not missing my shitboxes anymore
> Spanfeller is a twat
Oppenheimer - not missing my shitboxes anymore
> Spanfeller is a twat
08/15/2019 at 08:39 |
|
Not sure. I work at the auto industry and lots of times I’m like “hell, I could have done this better, but the bean counters are holding me back”
Yes, they’ve saved xxx grams on that, I get the philosophy behind but in the end of the day...it’s a dirty economy.
|
TysMagic
> Khalbali
08/15/2019 at 08:43 |
|
thanks!! I am pretty happy with them for sure
 Urambo Tauro
> TysMagic
Urambo Tauro
> TysMagic
08/15/2019 at 09:19 |
|
I’ve seen these kits for Mustangs. Still deciding whether I really want to pay that much (going rate is about $75-100) to do the conversion .
|
TysMagic
> Urambo Tauro
08/15/2019 at 09:23 |
|
I’d say $75 is about worth it, maybe wait for a sale otherwise. Tis almost that season again.
I like the cleaned up look and ease for sure. I suspect it will be something you’ll do and ask why did I wait so long haha